It's finally here!!! Back in June, I went to Right Off The Batt Pottery in Borden-Carleton, Prince Edward Island (Canada) with my Mom. Best girls day out ever! We had to leave the pieces there, to be glazed and fired. We were a little worried the pottery might break during shipping, but it was very well packed. Whew!
Here's my finished pieces. They came out beautiful!
- My blue/white glazed bowl
- Both my serving pieces
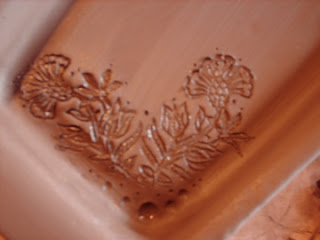
- An up close shot of the design on my serving platter
- The zoomed out view of the serving platter
Our wonderful teacher, Sarah, walked us through the whole process and made it fun! She's a chef turned potter, occupations which she says are not that different if you think about it... you get to create with your hands... the only big difference is you can't eat your pottery.
First, you start with a slab of clay, which you cover with a piece of dampened canvas.
Turn the wheel forward, then back, to flatten the clay out beneath the rollers.
Next, you have to scrape it down to remove the texture from the canvas. You don't want that on your finished product.
Hi Mom!
Next, trim your piece to fit the mold you've chosen. Clay doesn't stick to itself, so you can use unfired pieces as molds, or just really spray down a glazed and fired mold with non-stick cooking spray. Then, you dip your sponge into water and gently ease the clay down into the mold, making sure you don't rub too hard and wear the clay too thin (that will make it crack during firing).
After cleaning up the edges with your trimming tools, you can start adding details to your piece. They had drawers full of fun things we could use - stamps, shells, lace, etc. I chose a large stamp for the corner of my platter and used the ball tool to embellish it a little.
Next, we signed a slip of paper however we wanted it to appear on the bottom of our finished product. When the pieces dried enough to separate from the mold, Sarah transferred the signatures to the bottoms before sending them to be fired the first time. (They get glazed and fired more than once)
We also noted the color glaze we wanted used the finished product. I chose the white glaze for my platter.
After finishing our pieces, we watched a "throwing" demonstration with Robert (but I forgot to bring my camera!! So no pics of that, sorry!), their master potter. He explained in detail how the clay is shaped on the wheel (the process is called "throwing" the clay). We asked how they move the finished piece off the wheel. He showed us how a flat wooden piece (called a batt, aha! that's where batt comes in) attaches to the wheel and the clay is thrown onto that. When the piece is completed, the batt is removed and set aside until the piece has set up enough to be removed from the batt with a piece of wire.
Some other things I love about Right Off The Batt. They recycle everything, even the clay bits. The pottery and glaze do not contain harmful components (no lead in their products!). And the finished products are beautiful as well as durable. You'll be seeing more of my pieces in future posts as I use them to serve my latest culinary experiment.
Vacation Fun Rating: 5 out of 5!


Well, dearie, you taught me a lot more about pottery-making today! Thank you for a very thorough lesson! I enjoyed it so very much, and it looks like you and your mother had a wonderful time! Beka's mom
ReplyDeleteMy pieces arrived in perfect condition - Thanks for the wonderful surprise of going to spend a day with you making pottery! WHAT FUN!
ReplyDeleteluv you - momma